Want to discover more about your family history? Building a family tree is the perfect way to do that. Learn the ins and outs of searching through historical records & building out your family history.
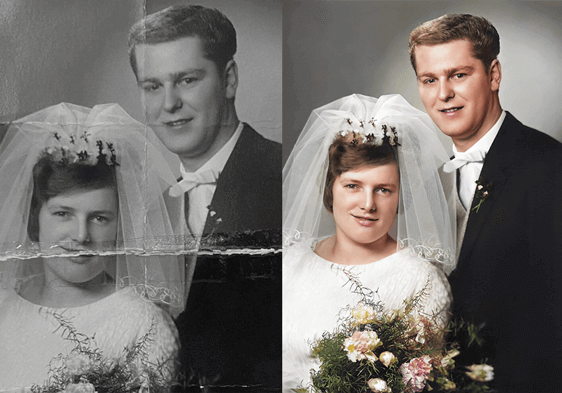
Photo restoration goes hand-in-hand with spending time with your family. If you’re looking to show some love to your family with a holiday gift, then this section is for you.
What is the difference between a 300 DPI and 600 DPI scan?
Which is the best DPI setting? Which is the best resolution for photos or film negatives? If you’ve ever asked these questions, you aren’t alone.
Generally, the best DPI setting depends on what you plan on doing with your photos – whether it’s to print them out, make digital copies, or share them online. This article will explain the differences between 300 DPI and 600 DPI (the most common DPI settings) and their specific purposes.
Before we explain the differences between 300 DPI and 600 DPI, it’s essential to know the basics of digital imaging. In this section, we cover need-to-know information about digital photos and how your flatbed scanner works.
Digital Images
Digital images are made up of many pixels with three values: red, green, and blue (RGB). When millions of these colored pixels merge in a grid, that creates your digital image. So when you save a digital photo, you’re actually saving an array of pixels that combine to form the image.
Scanners & DPI
When scanning a photograph, scanners “capture” the physical photo or document by recording it as a grid of pixels. In other words, the more pixels used to record the digital photo or document, the more detailed it becomes.
This measure of details on a scanned image is called the resolution. Image resolution on the screen is calculated in pixels per inch (PPI), while the measure for print is dots per inch (DPI).
Most photographs, documents, and images are scanned at 300 DPI or 600 DPI, with the DPI representing the number of dots for every inch scanned. For example, scanning at 300 DPI means each inch will be made up of 300 dots.
How DPI Settings Affect The Digital Image Quality
Having higher DPI values doesn’t automatically make your photographs better. While it’s true that higher resolution scans will turn out more detailed, cranking up the DPI can’t add more detail to the original photo.
What a higher DPI does is make your digital photo larger. For example, if you scan a 4×6 photo at 300 DPI, you’ll receive a digital image that’s 1200 pixels wide and 1800 pixels tall. Scanning the same photo at 600 DPI will give you a digital photo that’s 2400 pixels wide and 3600 pixels tall.
Larger DPI scan resolutions are great if you want to display or print larger photographs. For example, a 4×6 photo scanned at 300 DPI will still look great as a printed image in its original size, but it will lose overall quality if you order a larger print. Meanwhile, the same photo scanned at 600 dots per inch can still look good as larger prints.
Another thing to keep in mind is that higher resolutions have a higher pixel count – meaning larger file sizes. Other file formats also offer different levels of quality.
How Do I Choose My Scanning Resolution?
While it may be tempting to always use the highest resolution, scanner DPI setting, or pixel count possible, we don’t recommend it. To save time and storage space, you should think about your intended use of the photos rather than just going for the maximum resolution every time.
For example, if you’re just planning to upload the photo to social media or view them on a computer screen, 150 dots per inch/pixels per inch is fine. However, if you’re planning to take them to a print shop, you should go for a higher resolution.
Generally, a 600 DPI scan is the best image resolution and pixel count for paper photographs. High resolutions above 600 DPI are better suited for professional archive work due to the longer scan time and larger storage requirements.
If you have your own scanning device, we recommend choosing 600 DPI over 300 DPI as your default resolution because of the negligible differences between scan times and file size.
Tips To Get The Best Photo Scans
If you have a scanning device at home, scanning photos yourself is pretty easy. However, there are a few things that you need to keep in mind if you want the best picture quality. Here are four tips you can follow to get the best-looking scans.
Clean Your Scanner
A clean scanner glass gives you the best scan results. Rather than having to do clean-up afterward, it’s best to get the best scan quality possible from the get-go.
To clean your scanner bed properly, wipe it with a dry microfiber cloth. Never use tissue paper because it might leave debris and scratch the scanner glass surface. If your scanner glass has persistent smudges, you can try dampening your cloth before wiping again.
Ensure Your Photos Are Dust-Free
Another key to good scan results is a clean photo.
If you’ve just pulled out old pictures from an album, they may be covered in dust. To clean old photos, use compressed air to blow the dust off them. As with the scanner bed, never use paper tissues and definitely don’t use water to clean them because it may create even more damage.
Old pictures may also have creases, fold marks, or printing defects on them. Don’t try to fix them – this may cause more damage. Leave them as-is when scanning, and edit them out afterward using editing software.
Scan in Color
As a rule of thumb, every photo you scan should be scanned in color. Even when you’re scanning sepia and black & white photos, you’ll get a better result when scanning in color as color scans record more detail and preserve as much quality as possible. Moreover, while you can turn colored scans into grayscale, you can’t do the reverse.
Scan Multiple Images At Once
If you have several photographs that need scanning, consider scanning in batches to save time. Try placing your smaller photographs together on the glass bed with about a quarter-inch of space, then scan all of them at once. After scanning, you can simply crop each of them out using editing software and save them as individual pictures.
Why Hire A Professional Photo Restorer?
Even with your own scanning device, it may take a while before all your photographs are scanned. Moreover, the quality isn’t guaranteed. If you want the best results and to not have to worry about resolutions or pixel count, we suggest that you seek professional image restoration services to scan your photos for you.
Image Restoration Center offers photo scanning services to any client who wants their images restored. We create high-resolution scans and turn them into precious keepsakes that will last for years to come.
Our Photoshop experts and historical advisors can restore, colorize, repair, and revitalize your old pictures in a matter of days.